|
Freelander underbody skid
페이지 정보작성자 육혁 작성일05-01-22 01:34 조회3,836회 댓글1건 |
본문
The story of how my Freelander got a reinforced sump guard
This past February I joined some fellow RoverHolics on a trip to the amazing Oceano Dunes OHV area just south of Pismo Beach, CA – the last strip of beachfront sand dunes available to us for off road motorized recreation in California. We had a great weekend camping and of course “rovering” all over the dunes. Unfortunately though, I was a bit too aggressive on a few approaches to some steep dunes and I ended up bashing my stock sump guard pretty hard a few times. So hard in fact that I broke the rear mounting brackets! After some discussion with my Centre’s shop foreman I decided to save the $500+ that LR wanted for a new guard and to get it repaired independently. While I was at it I thought this would be the perfect time to build myself a skid plate extension to the guard, similar to the one created and shared by fellow freelanderliving.com member RonC.
I took my Freebie and broken guard to a local welder and we attempted to weld the OEM brackets back onto the guard. But things did not go well – the OEM bracket was made of thin aluminum and had a complicated support piece that was curved (I’m trying to get a picture of one…) and since they didn’t break cleanly it was difficult to weld them back on. We ended up being off on one side…

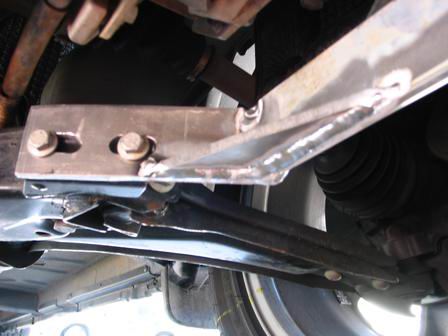
사진1 So we decided to build new brackets – bigger and stronger was the goal.
They’re made of 1/4" aluminum and no more crazy twists and bends. The arms of the sump guard were cut back about 1.5" and at an angle perpendicular to the mounting pla

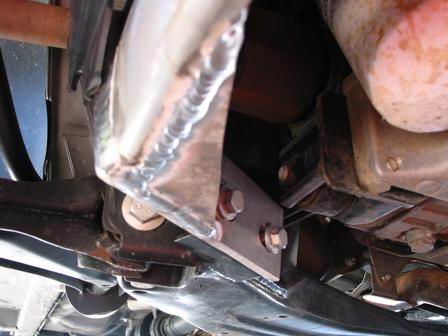
사진2 Here’s a view of the passenger side mount. Note the corner of the bracket near the engine mount has not yet been trimmed in this picture.
The new brackets cost me $130 for 2 hours of labor and the materials…not a bad deal!

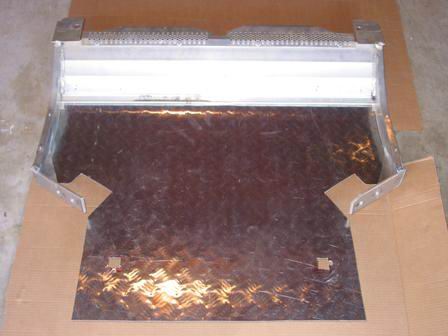
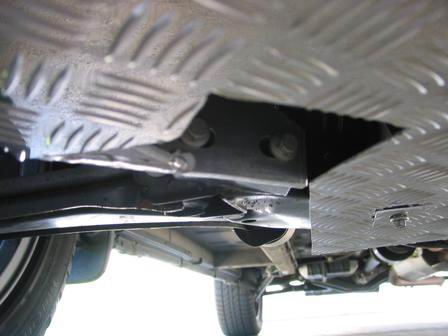
사진5 After some test fitting and some more cuts I had my final product. The guard was cut to length (it covers everything back until the sway bar) and I cut out space for a socket wrench at the new mounts. The plate is attached to the original guard by 5

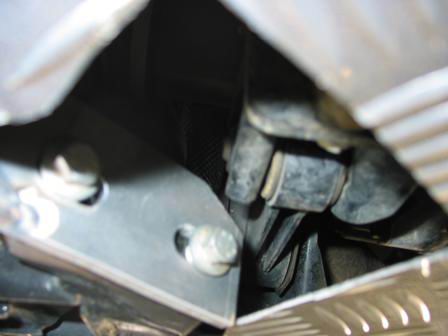
사진6 Another view of the finished guard, this time from the engine side looking down.
From this angle you can clearly see the cut out area for the rear mounting screws. You can also see my early attempts at fixed holes for these two screws. Due to the

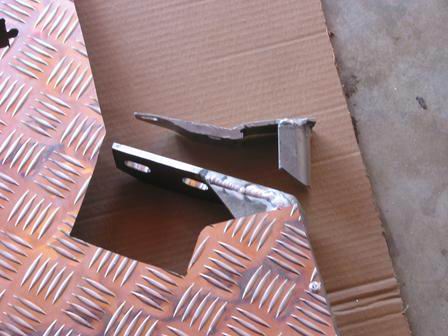
사진8 Comparison of the original bracket and section of arm next to the new bracket. By having cut the arms back and at an angle perpendicular to the mounting plate, the new bracket could be straight, making it much easier to manufacture and mount.
You

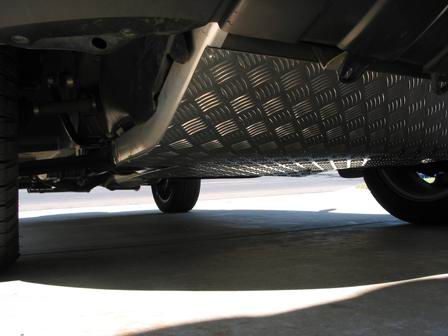
사진9 Here’s a shot of the guard with the new skid plate mounted on the FL.
Note the stock rear screw with its matching diamond plate washer holding the back of the skid plate to the frame. I’d like to replace those bolts with ones with smaller heads

사진10 Close up of the passenger side bracket - here you can see that the corner was cut to allow the engine mount to clear it.

사진11 View from the passenger front corner of the completed plate.

